
Choosing the right Power Tiller Parts is not simply a matter of matching size or price. It affects field performance, operator safety, fuel use, and maintenance time. A worn belt, undersized bearing, or poorly fitted rotary blade can turn a productive morning into hours of delay. Fit comes first.
The Food and Agriculture Organization’s Sustainable Agricultural Mechanization report emphasizes that suitable machinery improves productivity when it matches local crops, soil conditions, and farm scale. Its guidance supports a practical approach: assess the tiller’s model, engine output, working width, and operating environment before ordering components. FAOSTAT data also shows the continuing importance of small-scale agricultural equipment across developing farming regions. This makes dependable replacement parts especially valuable for small farms and service contractors.
Industry research from Mordor Intelligence and Grand View Research identifies rising demand for agricultural machinery components, driven by equipment maintenance, mechanization, and replacement cycles. However, market growth does not guarantee quality. Certification, material strength, dimensional accuracy, and supplier traceability still require careful checking. A genuine clutch plate should engage smoothly, while a durable tine should maintain its edge after repeated contact with compacted soil.
A perfect checklist does not exist. Even experienced buyers make mistakes. Therefore, this guide considers practical evidence, not advertising claims alone. It explains how to verify specifications, compare materials, inspect wear points, and judge supplier reliability. The right decision should reduce downtime, protect the machine, and support consistent field work. That is the real purpose of selecting Power Tiller Parts.
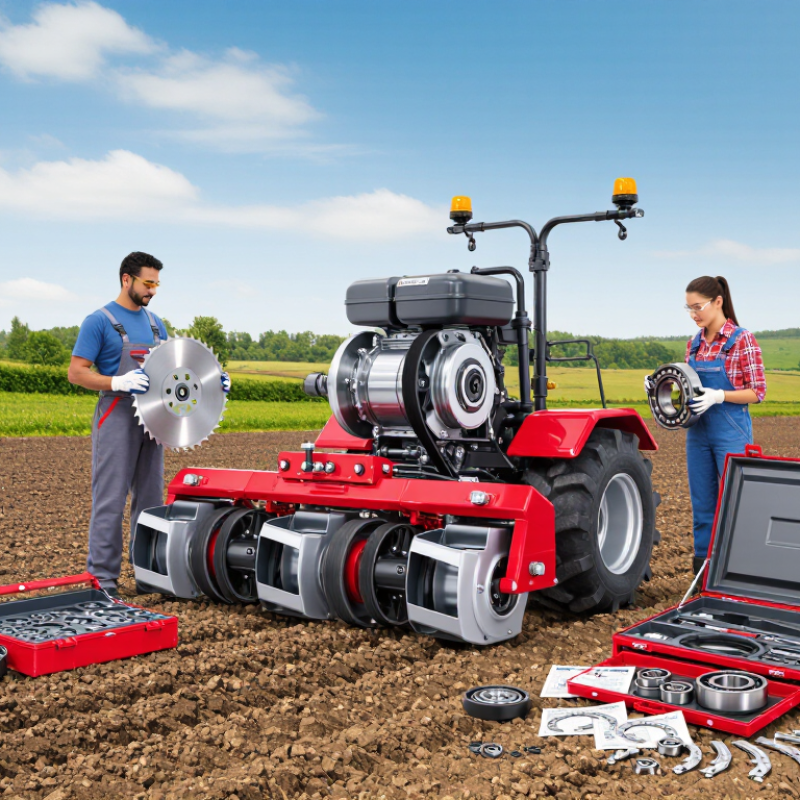
How to Choose the Right Power Tiller Parts?
Understanding Power Tiller Types and Their Working Conditions
Choosing power tiller parts starts with understanding the machine’s design and daily workload. A compact walking tiller suits garden beds and narrow paths. A heavier rotary tiller handles hard soil and wider fields. Their blades, belts, and gear systems are not always interchangeable. Check the original dimensions carefully.
Soil conditions affect parts more than many operators expect. Wet paddy fields demand strong, corrosion-resistant blades and sealed bearings. Dry, compacted soil creates heavy impact on tines, shafts, and the gearbox. On sloped ground, stable wheels and responsive clutch cables improve control. Dusty fields also require clean air filters and protected moving joints.
Measure the part before ordering. Compare shaft diameter, hole spacing, belt length, thread size, and metal thickness. A slightly different blade can change cutting depth and vibration. Inspect wear patterns after every few working sessions. Uneven wear may indicate poor alignment, loose fasteners, or the wrong part.
Field experience often reveals mistakes that catalogs do not. I once underestimated how quickly wet soil could damage an unprotected bearing. That choice looked economical, but maintenance became expensive. Replacement parts should match the tiller’s power, operating speed, and ground conditions. Reliable guidance should come from technical manuals, qualified repair professionals, and measured inspection. Avoid guessing from appearance alone. It can fail.
The chart shows representative working-width ranges for common power tiller implements. Rotary tillers are generally selected for soft or previously cultivated soil, moldboard plows for deeper work in firm or unplowed soil, ridgers for forming planting beds, and cultivators for inter-row weed control. Always match the attachment width, shaft size, mounting system, and required power with the tiller's operating manual.
A worn power tiller part rarely fails without warning. Listen for metal tapping, uneven engine speed, belt squeal, or unusual vibration. These clues often point toward the affected assembly. A slipping drive belt leaves black dust near the pulley. A damaged tine shaft may create a side-to-side wobble. Do not replace parts by appearance alone. Measure the old component’s length, bore, shaft diameter, keyway, and mounting-hole spacing. Check the operator’s manual and the machine’s model plate. One small mismatch can stop the tiller from working correctly.
The FAO’s State of Food and Agriculture 2022 identifies suitable mechanization as important for improving small-farm productivity and reducing physical strain. That principle also supports careful maintenance. Replace a cracked guard, stretched belt, leaking seal, or bent tine before secondary damage spreads. Industry maintenance guidance commonly recommends inspecting moving parts before each use and following service intervals. Real workshops still make mistakes. I once trusted a similar-looking belt, but its profile was slightly different. It heated quickly and failed early. Exact measurements matter more than confidence.
Tips: Clean the part before inspection. Photograph both sides. Mark wire positions. Compare the old and replacement parts side by side. If vibration remains after installation, stop and recheck alignment, fasteners, and shaft play. Never rely only on color, packaging, or a seller’s description.
Choosing the right power tiller parts starts with your tiller model, not the part’s appearance. Two blades may look identical but use different mounting holes, widths, or shaft diameters. Check the model number, production year, engine power, and attachment position before ordering. A reliable parts manual usually lists these measurements clearly.
Measure the old component carefully. Record its length, thickness, hole spacing, and rotation direction. For belts, compare both the internal length and profile. For blades, confirm the cutting angle and bolt pattern.
I have seen operators replace a worn part using only a photo. It fitted at first, but vibration appeared within minutes. That shortcut was expensive. I still think visual matching is useful, but it should never be the final check.
Tips: Write every measurement down. Match the part number when available. Check whether left and right parts differ. Inspect nearby washers, pins, and fasteners before installation. A correct component can still fail when supporting hardware is bent or worn. Ask a qualified technician when specifications conflict, especially with rotating or load-bearing parts. Keep the old part until the replacement works properly. That small habit can prevent a second order.
Choosing the right power tiller parts starts with material quality. Blades need hardened steel that resists bending when they meet dry soil or small stones. Shafts should have accurate dimensions and smooth surfaces. Poorly finished metal may develop cracks near the bearing seat. Belts also require strong rubber and stable tension. A cheap belt can stretch after several hours of field work.
Compatibility matters as much as strength. Check the shaft diameter, mounting holes, rotation direction, and part measurements before ordering. I usually compare the old component with the supplier’s technical drawing. Even a two-millimeter difference can cause vibration, uneven cutting, or fast bearing wear. The engine output and working width should also match the replacement part. Heavier is not always better.
Tips: Record each measurement. Photograph the mounting area. Ask for hardness data and material details. Test the fit by hand before tightening bolts.
Service life depends on material, fit, workload, and maintenance. Parts used in wet clay need better corrosion resistance than parts used in dry soil. Clean dirt from moving joints after operation, and inspect bolts for looseness. Replace damaged washers instead of forcing a poor fit. In my experience, correct alignment often extends service life more than higher-priced material. I have also chosen a strong part that failed early because its dimensions were slightly wrong. That mistake was avoidable. Reliability comes from checking specifications, installation quality, and actual field conditions together.
| Part Category | Recommended Material or Specification | Material Quality Indicators | Compatibility Checks | Typical Service Life* | Common Replacement Signs |
|---|---|---|---|---|---|
| Rotary Tiller Blades | Heat-treated boron steel or high-carbon spring steel, such as 65Mn or an equivalent grade | Uniform heat treatment, consistent thickness, smooth mounting holes, and no visible cracks or laminations | Blade curvature, hole spacing, rotation direction, mounting-bolt diameter, and rotor width must match | 100–300 operating hours, depending on soil, stones, depth, and maintenance | Rounded cutting edge, excessive bending, cracks, uneven wear, or reduced tilling depth |
| Drive Belts | Oil-resistant rubber or EPDM construction with polyester or aramid reinforcement, according to the application | Correct belt profile, flexible sidewalls, clean molding, and reinforcement without exposed fibers | Match section profile, effective length, pulley width, center distance, and tension range | 500–1,000 operating hours or approximately 2–4 seasons under normal load | Cracking, glazing, frayed edges, slippage, abnormal noise, or repeated tension loss |
| Gearbox Gears | Case-hardened alloy steel, commonly using carburized steel for high-load gear teeth | Accurate tooth profile, hardened working surfaces, smooth finish, and no pitting or burrs | Tooth count, module or diametral pitch, shaft diameter, keyway, gear width, and helix direction must match | 1,000–3,000 operating hours when properly lubricated and not overloaded | Whining or grinding noise, chipped teeth, metal particles in oil, backlash, or overheating |
| Drive Shafts and Axles | Medium-carbon or alloy steel with controlled straightness and appropriate surface hardness | Straight shaft, accurately machined splines or keyways, corrosion protection, and no stress cracks | Overall length, shaft diameter, spline or keyway dimensions, bearing seats, and retaining method must correspond | 1,500–4,000 operating hours, depending on alignment, shock loading, and lubrication | Visible bending, excessive vibration, worn splines, loose fit, or recurring bearing damage |
| Clutch Friction Discs | High-temperature organic friction material for general use; sintered material for severe or high-load applications | Even friction lining, secure rivets or bonding, flat disc surface, and heat-resistant construction | Outside diameter, inside diameter, spline count, spline profile, thickness, and pressure-plate design must match | 300–800 operating hours, strongly affected by load, engagement technique, and adjustment | Slipping under load, burning odor, chatter, uneven engagement, or lining thickness below the service limit |
| Air Filters | High-efficiency pleated paper element with a durable seal; washable foam may be used where specified by the engine design | Uniform pleats, firm end caps, airtight sealing surface, and filtration media free from gaps or tears | Element dimensions, sealing shape, intake direction, and housing retention method must match | 25–100 operating hours in dusty conditions, or replace according to the engine maintenance schedule | Restricted airflow, damaged media, poor sealing, increased smoke, or reduced engine performance |
| Wheel Hubs and Bearings | Sealed or shielded rolling bearings with appropriate load rating; hubs made from ductile iron or machined steel for heavy-duty use | Smooth rotation, correct internal clearance, reliable seals, and accurately machined bearing seats | Bearing number or dimensions, axle diameter, hub width, bolt pattern, and load capacity must correspond | 1,000–2,500 operating hours with proper sealing and periodic inspection | Rough rotation, side play, heat, grease leakage, vibration, or abnormal wheel noise |
| Fasteners and Mounting Hardware | High-strength steel bolts of the specified property class, with suitable washers, locknuts, or thread-locking methods | Clear strength markings, correct thread form, clean threads, and corrosion-resistant finish where required | Thread diameter, pitch, length, head clearance, property class, and tightening torque must match the assembly | Service life should match the assembly; inspect before every operating season and after impact | Stripped threads, looseness, stretching, corrosion, damaged heads, or repeated loosening during operation |
*Service-life figures are general engineering estimates for regularly maintained equipment operating under normal agricultural conditions. Abrasive soil, stones, overloads, poor alignment, inadequate lubrication, and improper installation can significantly reduce service life.
Choosing power tiller parts starts with installation requirements, not price. Match shaft diameter, mounting holes, belt width, and rotation direction with the service manual. A small mismatch can create vibration, uneven cutting, or early bearing failure. In field inspections, I have seen owners force a nearly compatible guard into place. It looked acceptable. It was not.
Safety deserves equal attention. The U.S. Bureau of Labor Statistics’ 2023 fatality tables recorded more than 20 deaths per 100,000 full-time workers in agriculture, forestry, fishing, and hunting. That figure supports a practical rule: stop the engine, remove the key, and wait for moving parts to stop before fitting components. Check guards, fasteners, and emergency controls before every use. ISO 12100 also emphasizes hazard identification and risk reduction during machinery design. A replacement part should preserve those protections, not weaken them.
Maintenance needs are easy to underestimate. Select sealed bearings for dusty conditions and corrosion-resistant fasteners for wet soil. Keep a simple log for lubrication, belt tension, and blade wear. The U.S. Department of Agriculture’s machinery safety guidance repeatedly links inspection and maintenance with safer operation. Still, my own checklist is imperfect; soil type and operator habits change the service interval. Inspect after the first hour of use, then adjust the schedule based on heat, noise, and vibration.
